
INSTRUMENTS > FAQ > GL900
GL900
Connecting GL900 to computer via USB > Click here
Turn on pulse / logic > Click here
Adjust temperature to zero > Click here
Converting file GBD to CSV on GL900> Click here
Print screen or save screen display on GL900> Click here
Reading RMS on GL900 > Click here
Calculating RMS minimum and maximum realtime on GL900> Click here
Saving / transferring files from GL900 to flash drive> Click here
CONNECTING GL900 TO COMPUTER VIA USB
Step 1: Download and install both the USB driver and the APS software, please contact tech support department.
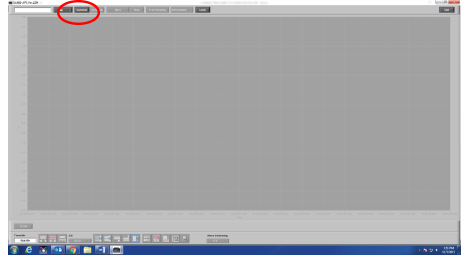
Step 2: Once you have downloaded and installed both items, proceed to opening the GL900 APS software. You see the screen below once open, next you will click on the connect button (highlighted in red).
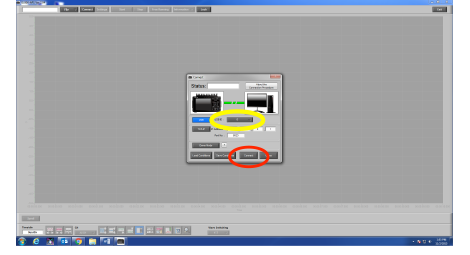
Step 3: You will now get a pop up window and will see many options. Make sure the USB ID numbers matches on your GL and the APS Software. You can check this on your GL by hitting the MENU button on the actual device and scroll through the menu to the OPT tab. Here you will see the USB settings and what your USB ID is set too. Double check with what’s on your APS(highlighted in yellow). Now that everything correlates with one another, Choose the connect button (highlighted in red).
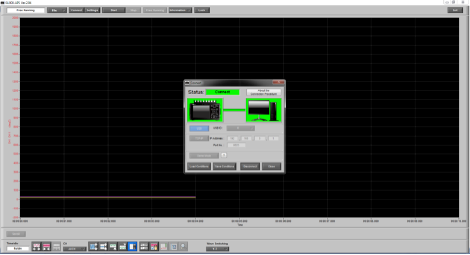
Step 4: Now after you hit connect, you want to make sure the images of the GL900 and the computer turn green, this helps signify that they connected properly (just like the image below). Now that you have done this, hit the closed button on the right of the connect button and it will load your GL900 onto the software.
TURN ON PULSE / LOGIC
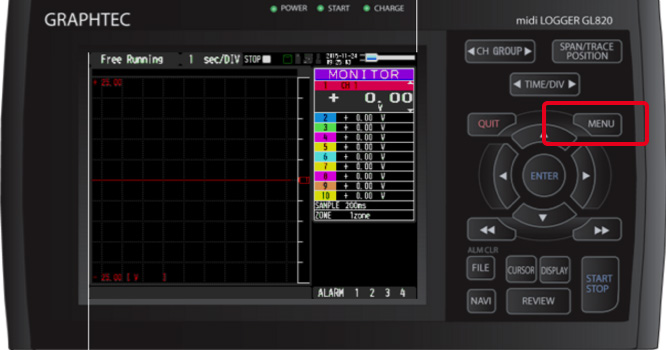
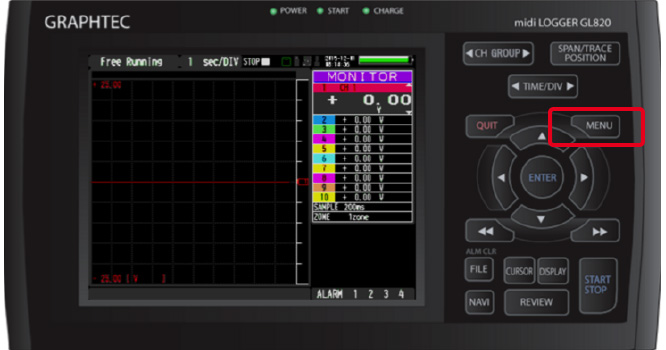
Step 1: From the main screen on your unit, hit the “MENU” button to proceed the menu screen.
Step 2: Once the “MENU” screen has come up, scroll down using the down arrow key.
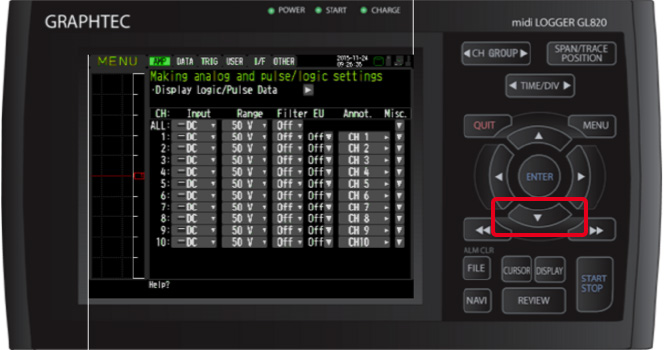
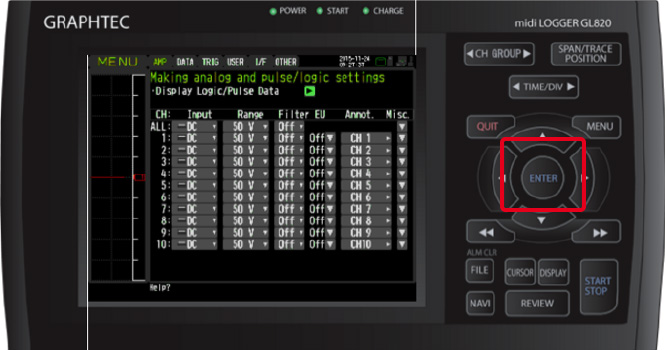
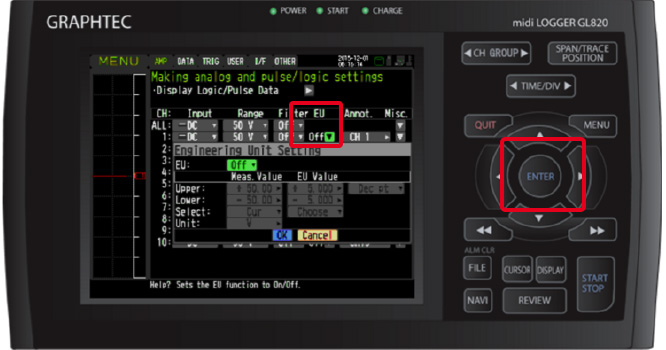
Step 3: Scroll down once until you reach the “Display Logic/Pulse Data” and hit the “ENTER” Button.
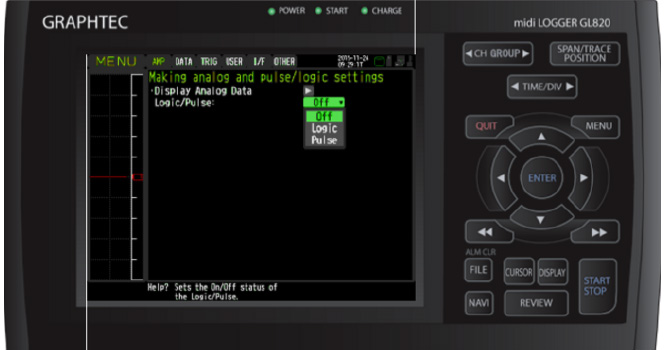
Step 4: Once at the “making analog and pulse/logic settings” Menu, on the Logic/Pulse option, choose which one you would like to use. Either Pulse or Logic.
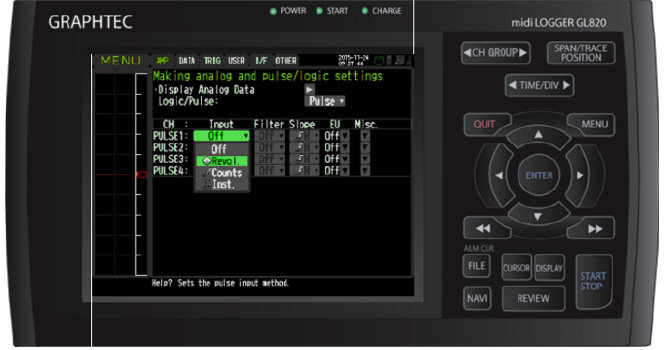
Step 5: Now choose which Input you would like to use, you have 3 different options to choose from.
Step 6: You ca also use the Engineering scale to make sure the signal you have coming in is correct. When you are setting the high and lows for your pulse/ logic signal, the first column which says measured value will be your voltage range of the sensor that you are using. The second column, which is EU value will be the range at which your sensor can read (ex: 0 – 60 PSI).
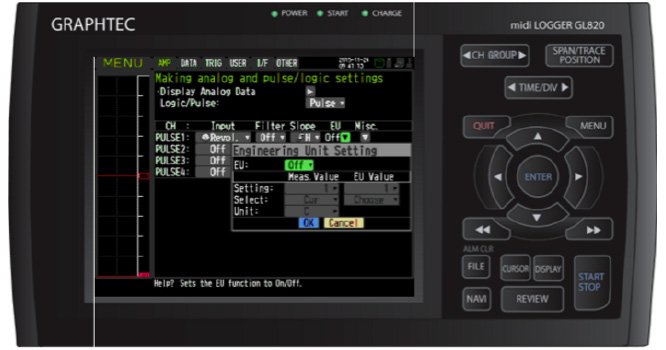
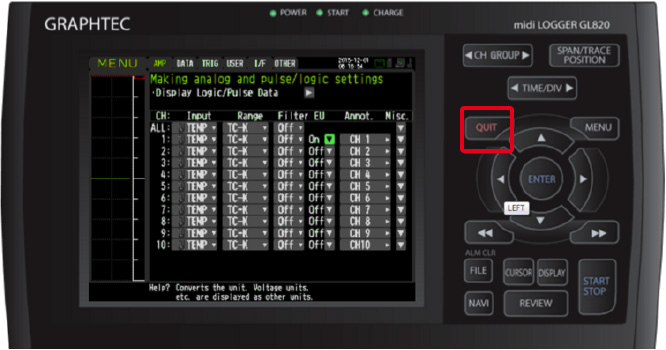
Step 7: Once all of your values are set, you can hit QUIT on the GL to return to the main screen.
ADJUST TEMPERATURE TO ZERO
Step 1: From your GLXXX main screen hit the MENU button.
Step 2: When on the MENU screen, Scroll down to the channels you will be using to measure.
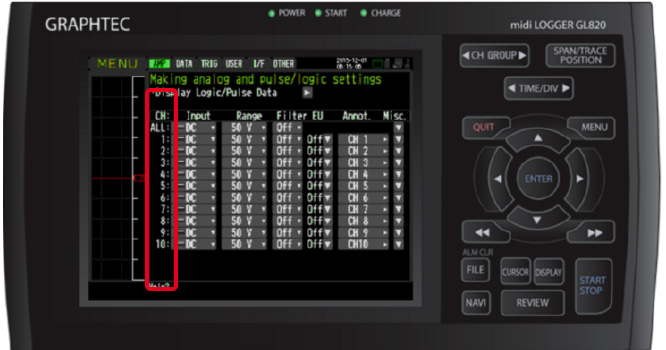
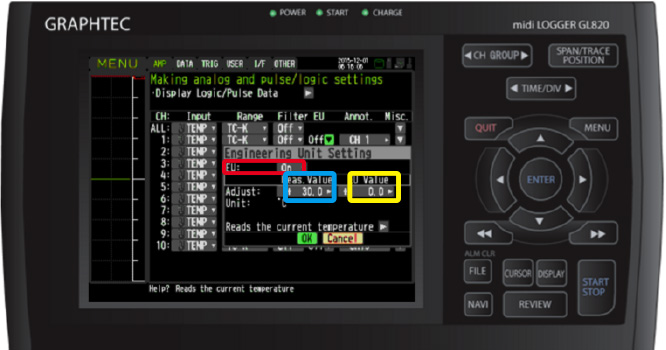
Step 3: Once you have picked which channel, scroll over to the right to the EU Column and click ENTER to bring the drop down MENU.
Step 4: Turn the EU Setting to on (highlighted in red). To set your adjustment you will use the adjust values. The Measured (highlighted in blue) will be what your Temperature is reading and your EU value (highlighted in yellow) will be what you want it adjusted to. SO if your temperature is off by 30 and you want to measure 0, then set the measured value to 30 and the EU value to 0. Once you values are set, click ok on the drop down menu to save settings.
Step 5: You can proceed with changing other channels to what you need or you can hit the QUIT button to exit back to the main screen.
CONVERTING FILE GBD TO CSV ON GL900
Note: You can only convert from GBD to CSV, not the other way around. So it is best to save in GBD as you can convert to CSV at any time.
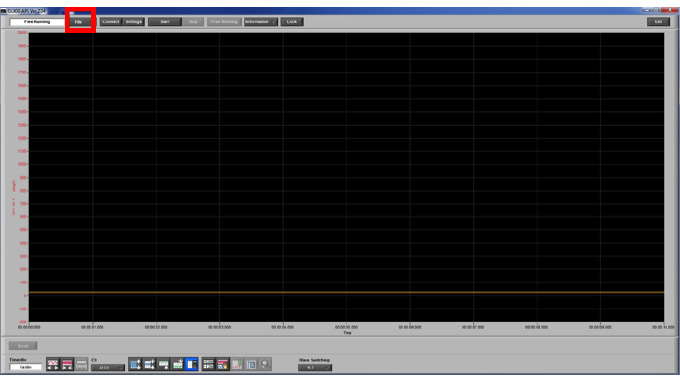
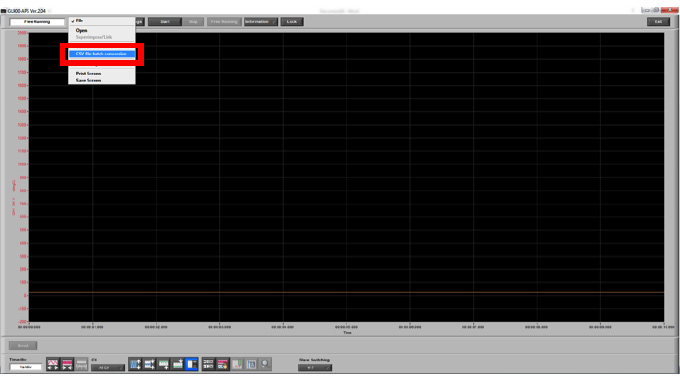
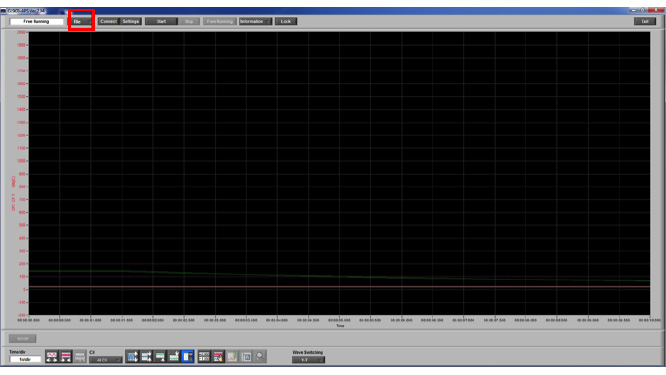
Step 1: Once you have opened the APS and connected the GL, you must press the File button located near the top left of the screen (highlighted in red).
Step 2: After clicking the file option, a drop down menu will appear and you choose the option GBD file batch conversion (highlighted in red).
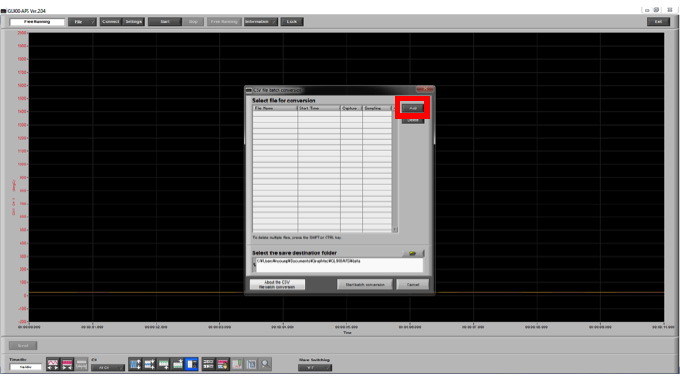
Step 3: A new menu will pop up now that you selected the file option. From here press the add button (highlighted in red). This menu is a batch menu where your added files that you want to convert will show.
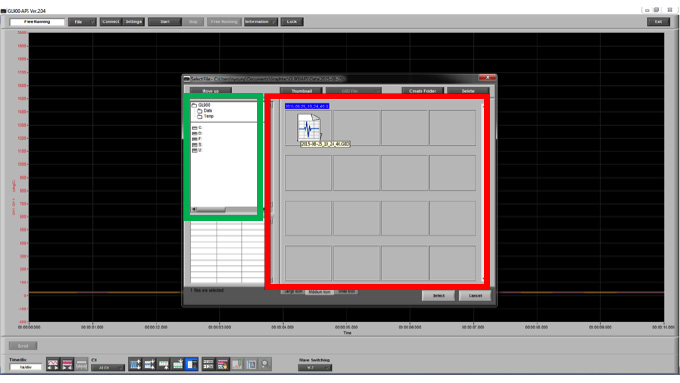
Step 4: When the new window pops up, you will have options on the left hand side on choosing where you are importing the file from (highlighted in green). Your files will appear on the right of where you select the file. Here is where you will see the files that are in the location you are choosing from, this is where you select the file you want (highlighted in red).
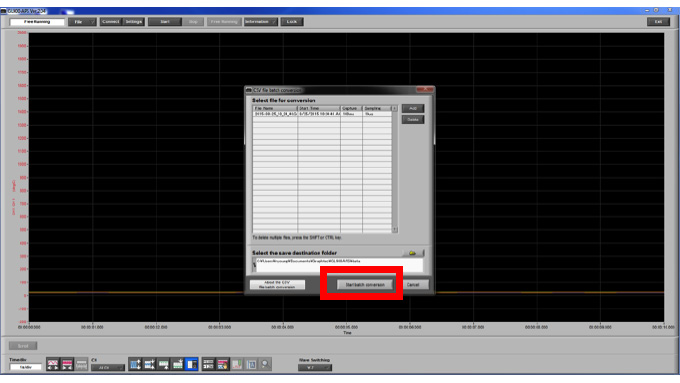
Step 5: After your file is selected, you will see what you chose pop up in the batch menu. From this point, you can either add more files to the batch or you can select start batch conversion (highlighted in red) which will convert the file you have selected.
PRINT SCREEN OR SAVE SCREEN DISPLAYS ON GL900
Step 1: After you open the software and connect your GL, you will be at a screen similar to this one. Here your graph will display the signal in the form of a wave or you can change the display to digital(highlighted in green).
Step 2: To either print or save what you have on the screen (does not matter which screen you’re in), you have to select the file option located on the upper right hand side of the screen (highlighted in red).
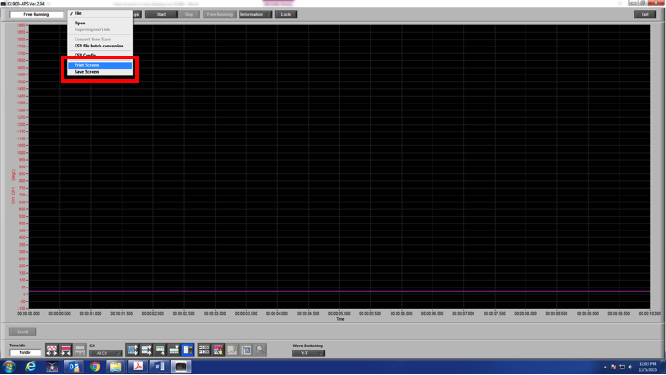
Step 3: Once you click file operations, you will get a get a drop down menu. The bottom two options on that new menu (highlighted in red), are to either print (will send screen shot to printer) or to save screen (which will save screen shot) to either internal or external memory
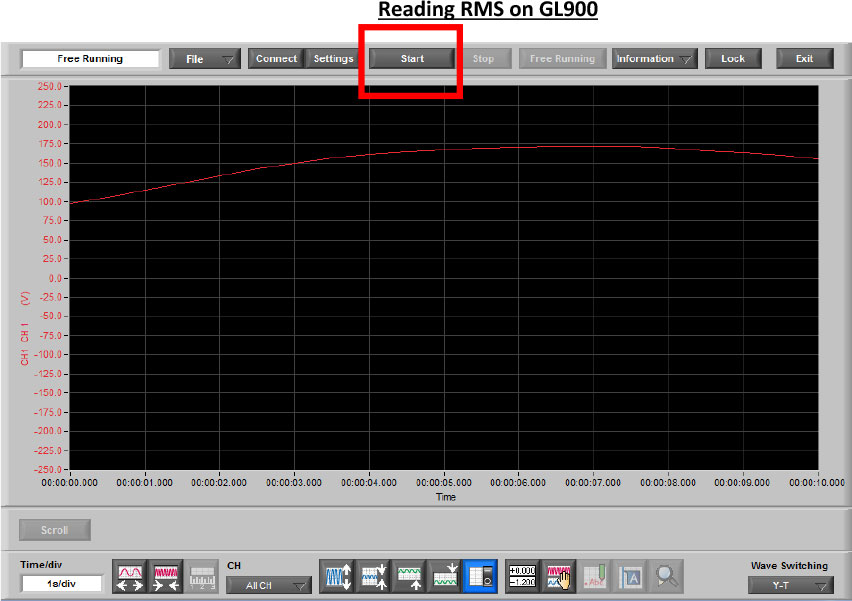
READING RMS ON GL900
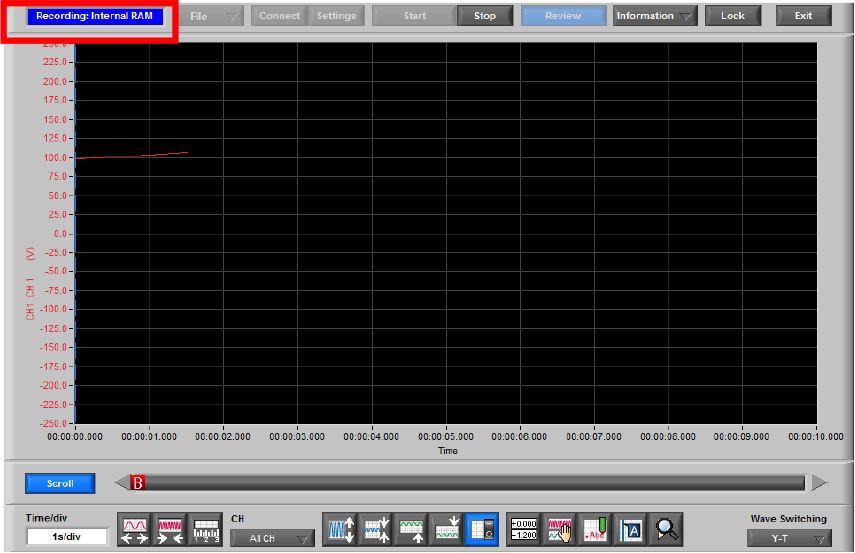
Step 1: Open up GL900 APS and Connect GL to software. Once Connected, and you go the AC signal you want to measure, Go ahead and hit the Start Button (highlighted in red).
Step 2: Once Recoding, you will see the status change from free running(as shown in previous picture) to Recdording (highlighted in Red). Once you have recorded a full wave or the portion of the singal you want, you can press the STOP button (highlighted in yellow).
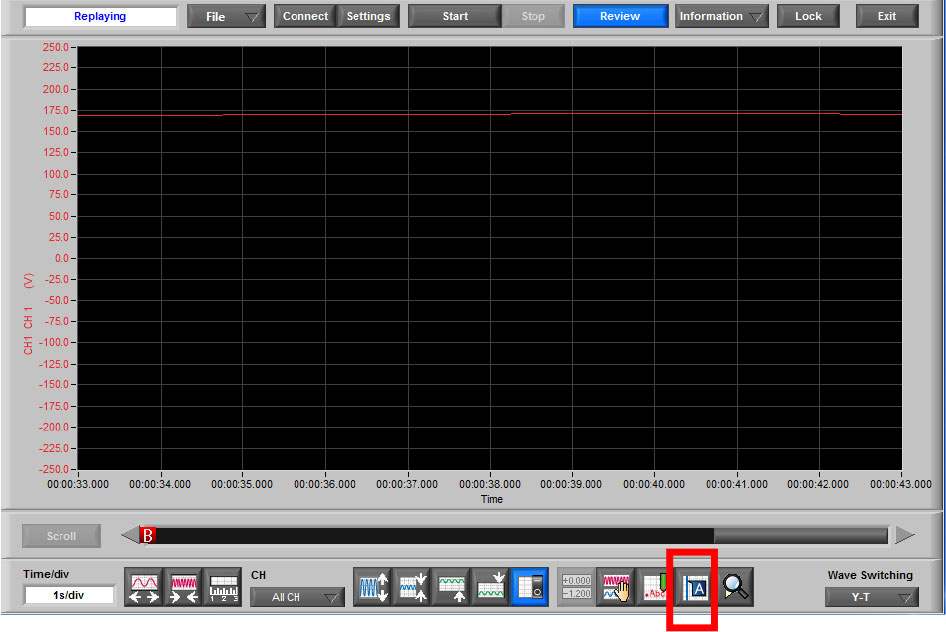
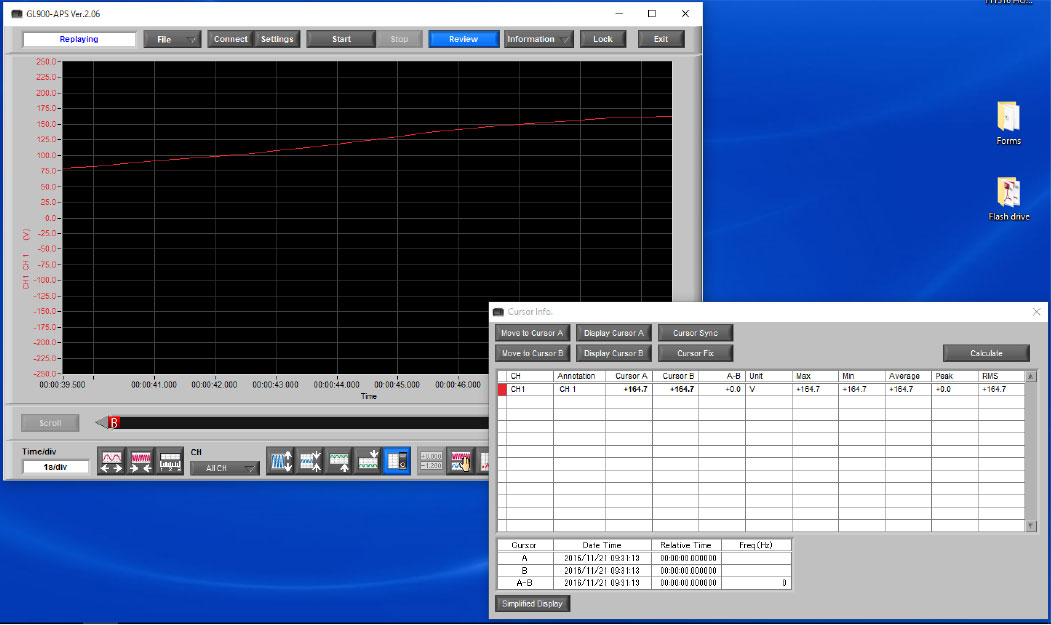
Step 3: Now that you have stop recording, the APS will leave you on the recoded file for your viewing needs. Here is where you can calculate your RMS using the software. To do so, hit the Cursor Info Button(hihglighted in red)
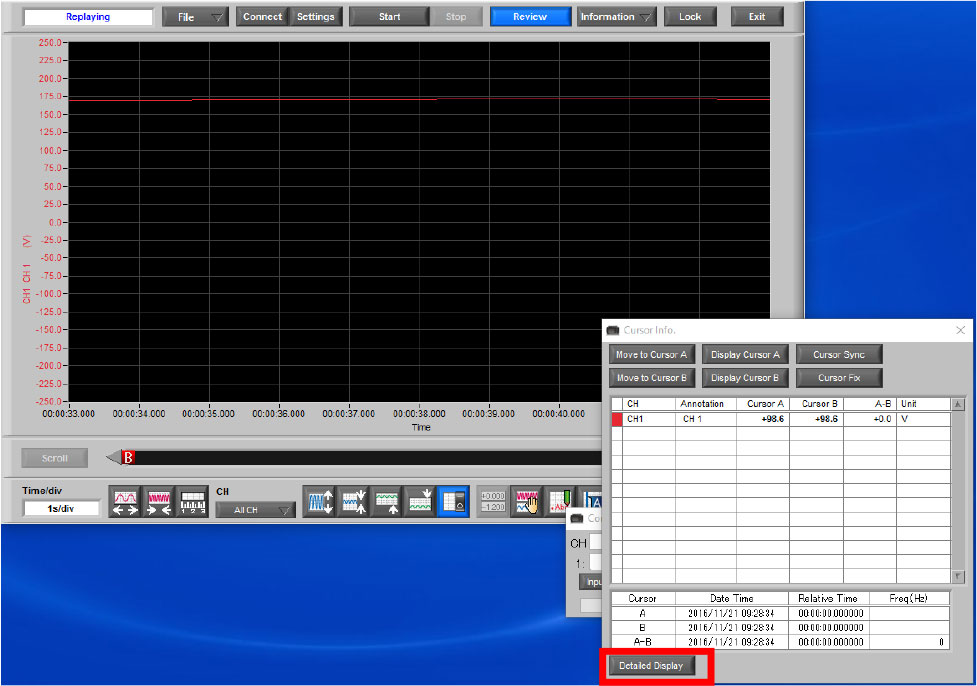
Step 4: Now that the cursor screen has popped up, go ahead and hit the Detailed display button(highlighted in red)
Step 5: From here, press the Calculate button(highlighted in red) to see your results.
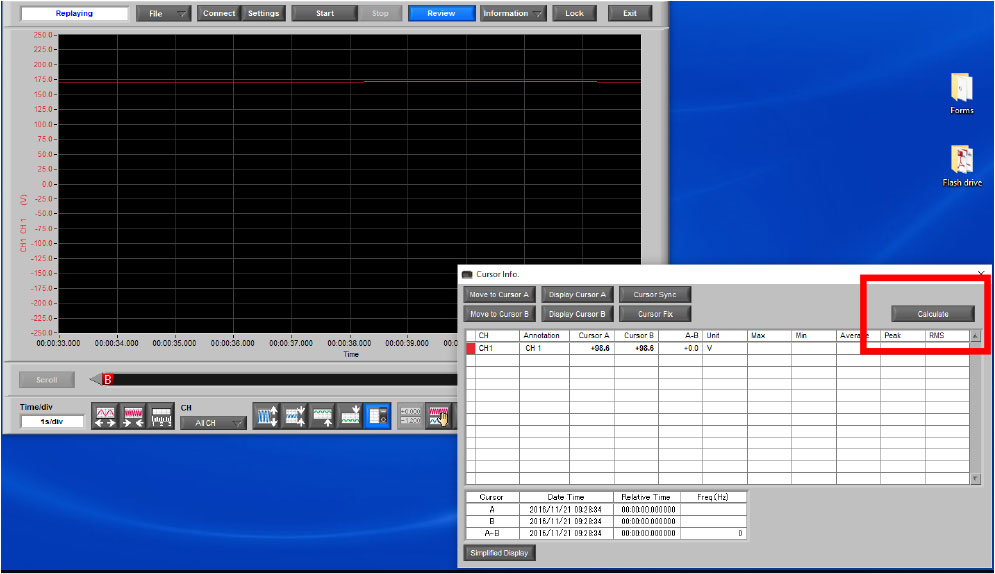
Step 6: You can now see detailed information on the spot your cursor is in. This chart will now also give you your RMS value.
CALCULATING RMS MINIMUM AND MAXIMUM REALTIME ON GL900
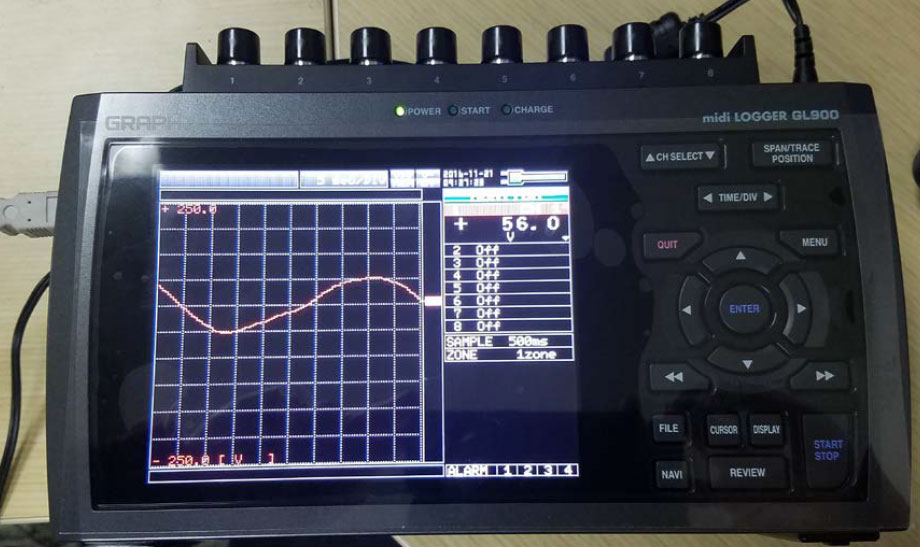
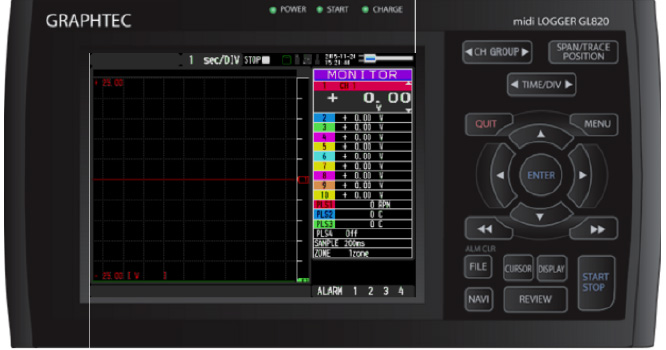
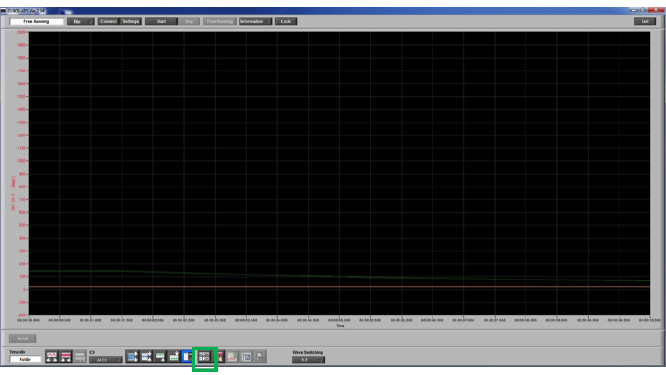
When trying to vie RMS directly from GL900, you must first get your input established and make sure you’re monitoring correctly through the GL900 main screen as shown above. From here you will click the Display Button (highlighted in red) 2 times or until your reach a similar screen as below.
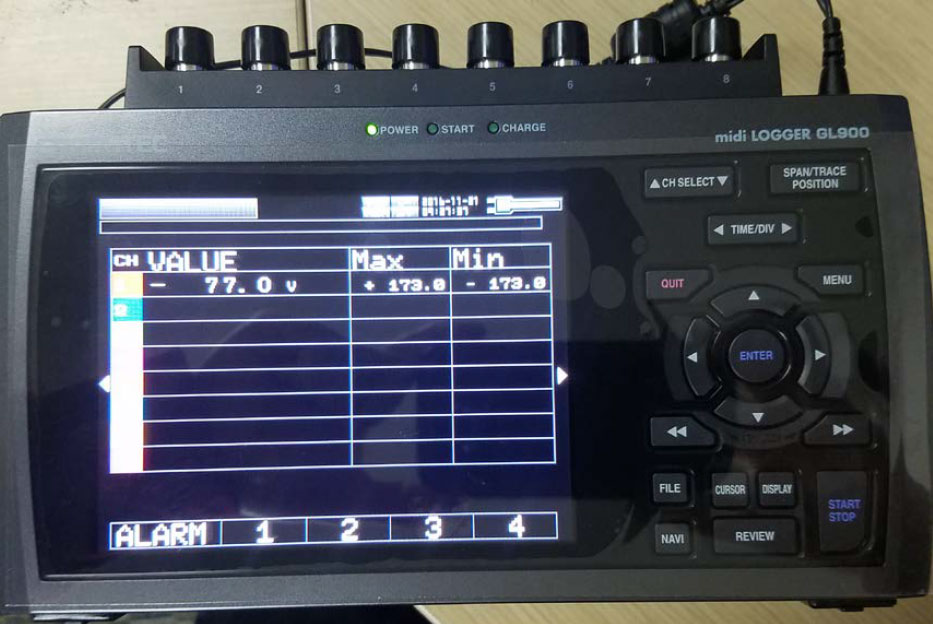
This will give you the Max and min of the AC signal, so with this you can calculate the RMS in real time.
SAVING / TRANSFERRING FILES FROM GL900 TO FLASH DRIVE
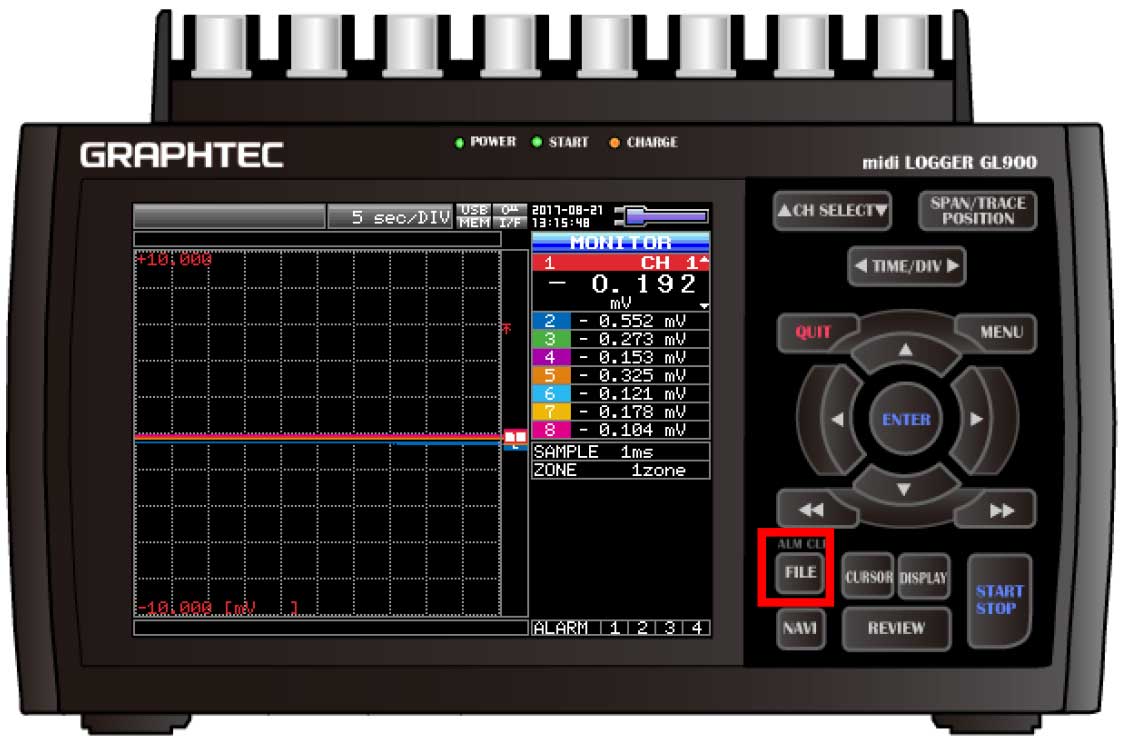
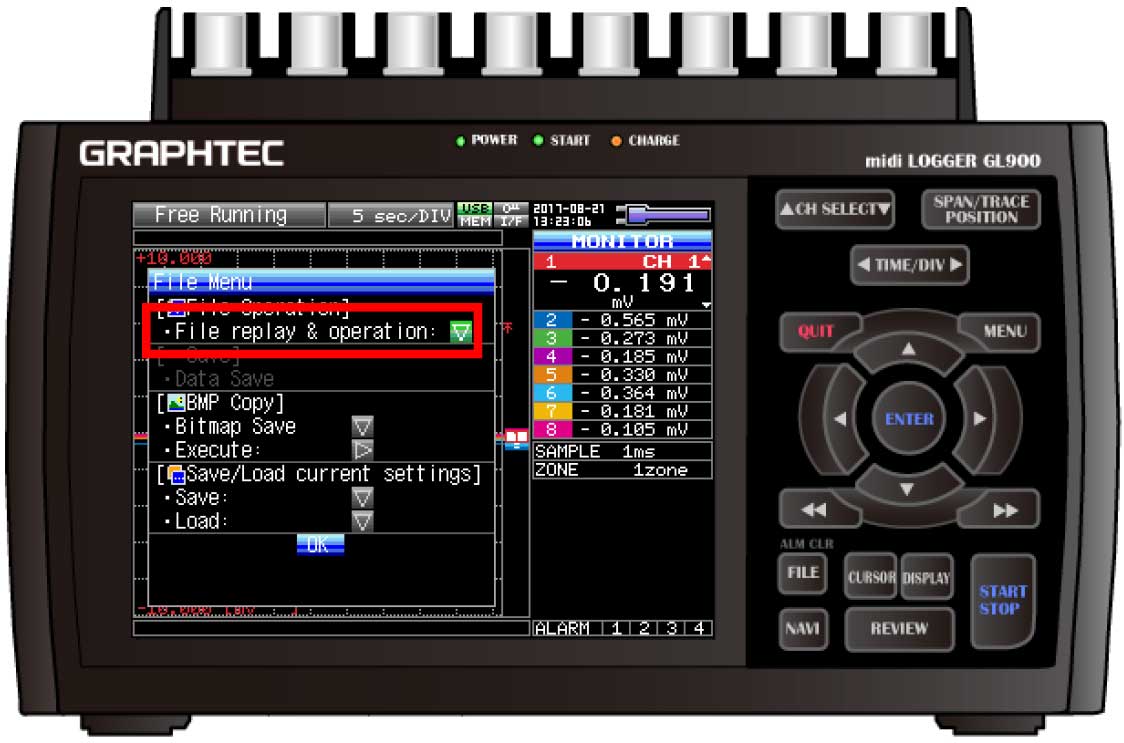
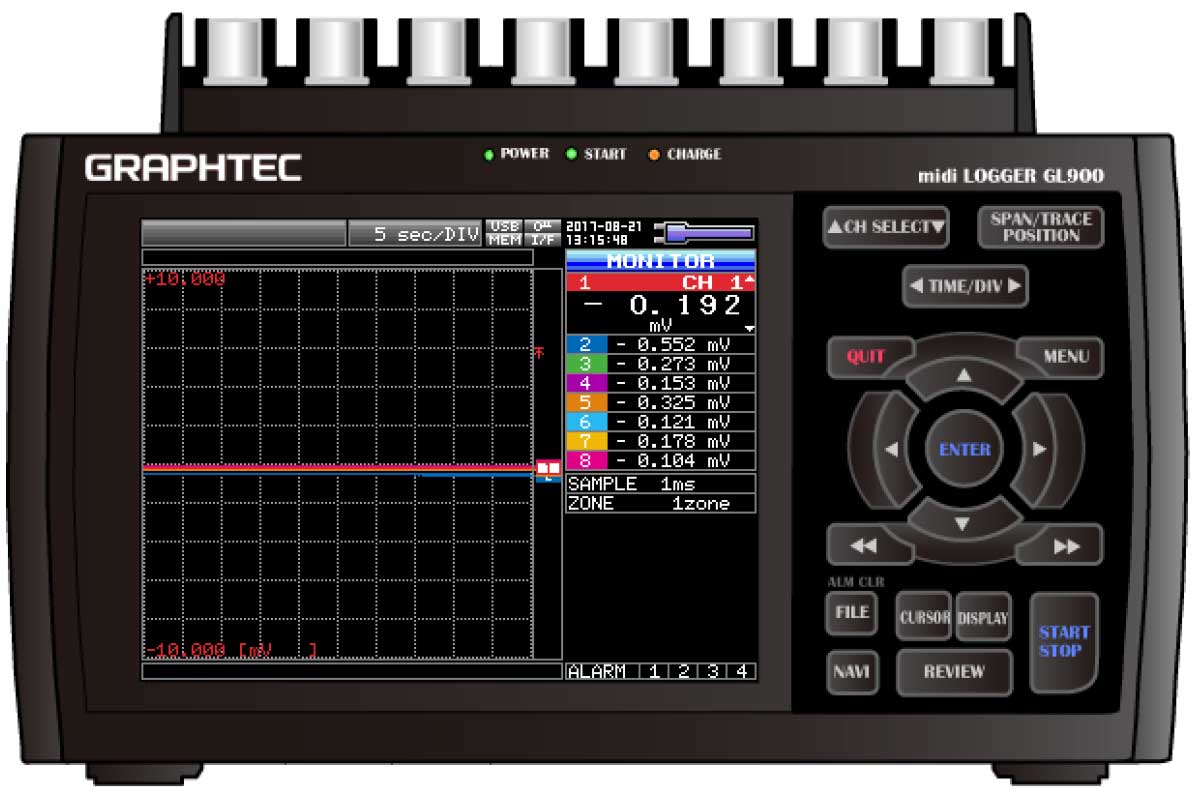
Step 1: After your unit is powered on and your Flash Drive is plugged in, power on the unit and wait until you see a similar screen up above. From here Press FILE (highlighted in red).
Step 2: Hit ENTER on the File replay & operation (highlighted in red).
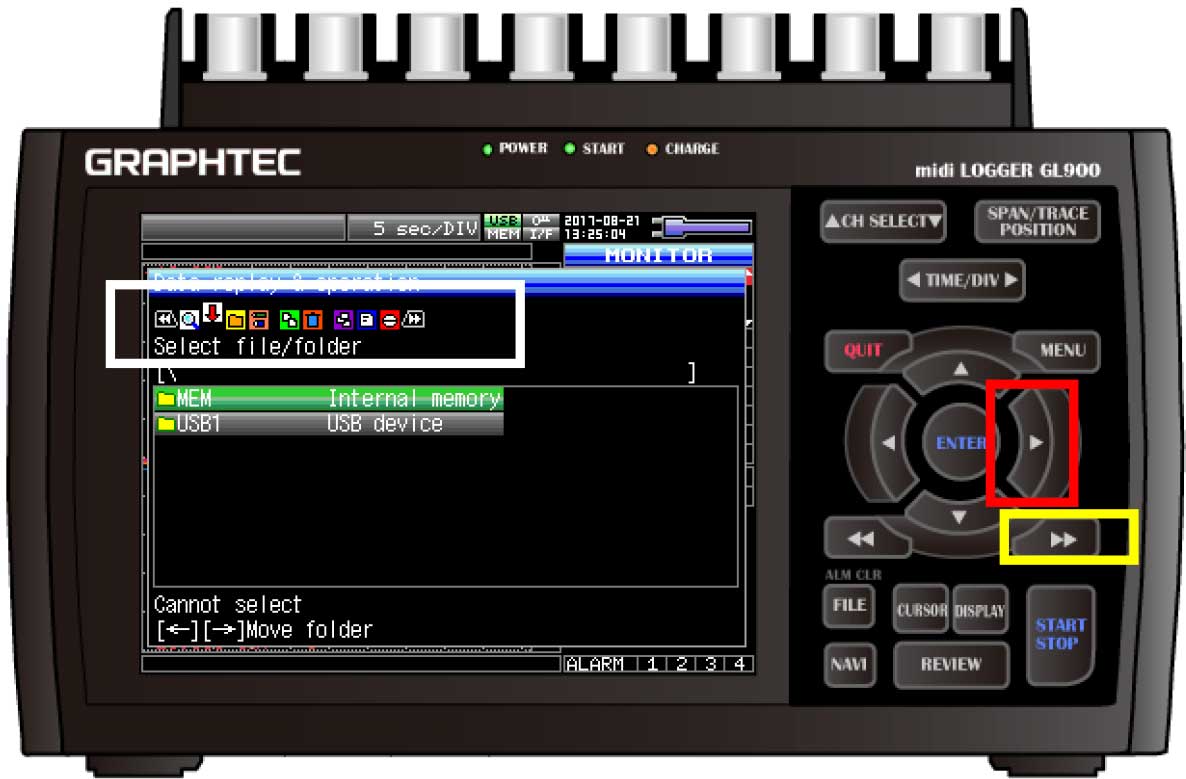
Step 3: Now this menu can be a bit tricky to operate. To Enter into a folder and it subfolders such as MEM as you see highlighted in green above, you must hit the right arrow key (highlighted in red) to go forward into to the folder, to go back, just hit the left arrow key.
Now to navigate through the tabs of this menu (highlighted in white) you must use the double right arrow key (highlighted in Yellow) to navigate through the menu choices.
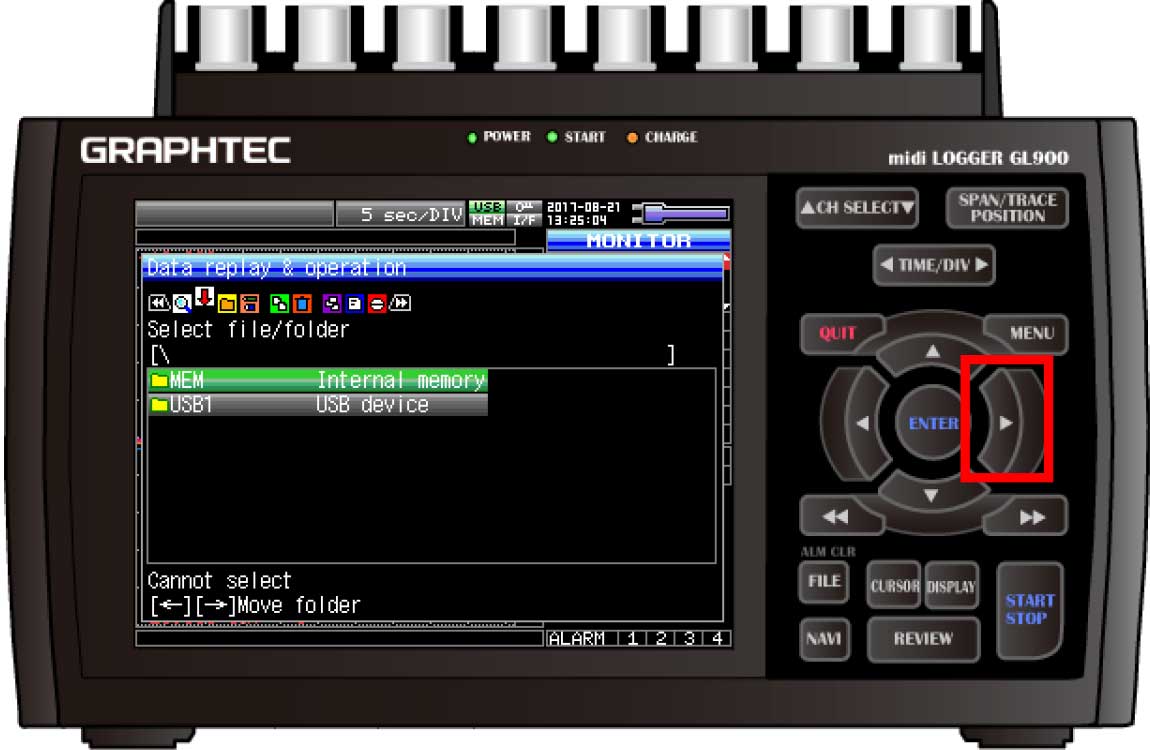
For an example, we will copy a file form the GL900 to the Flash Drive.
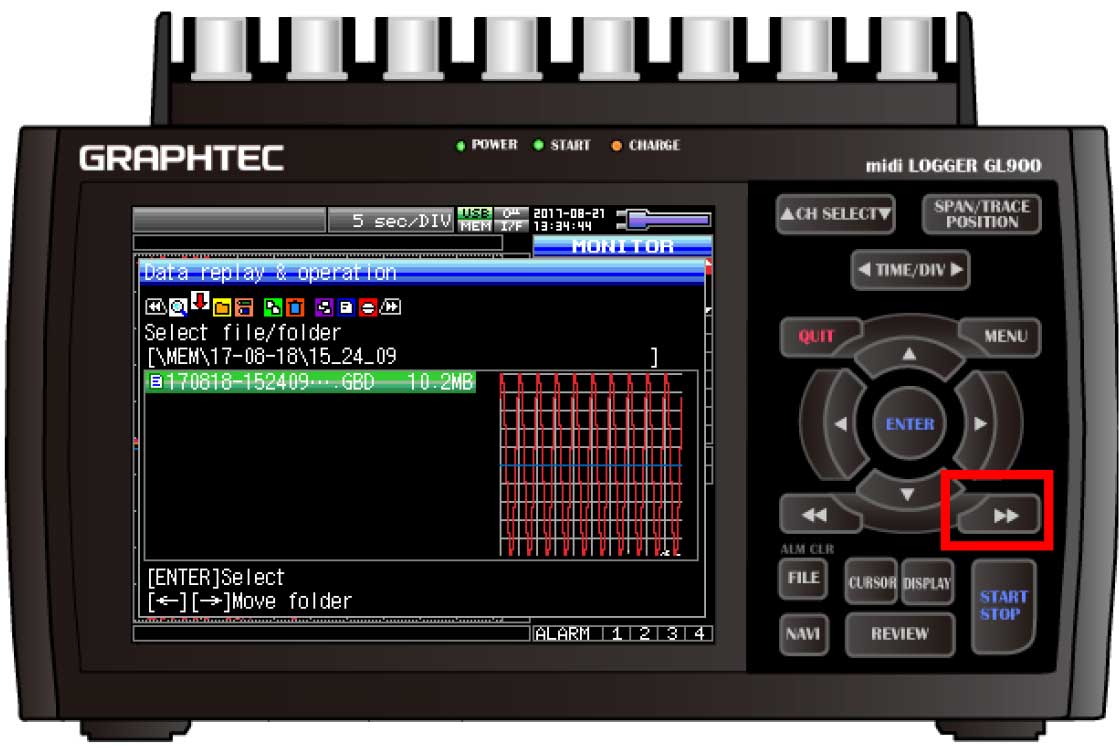
Use right arrow key (highlighted in red) to enter the folder.
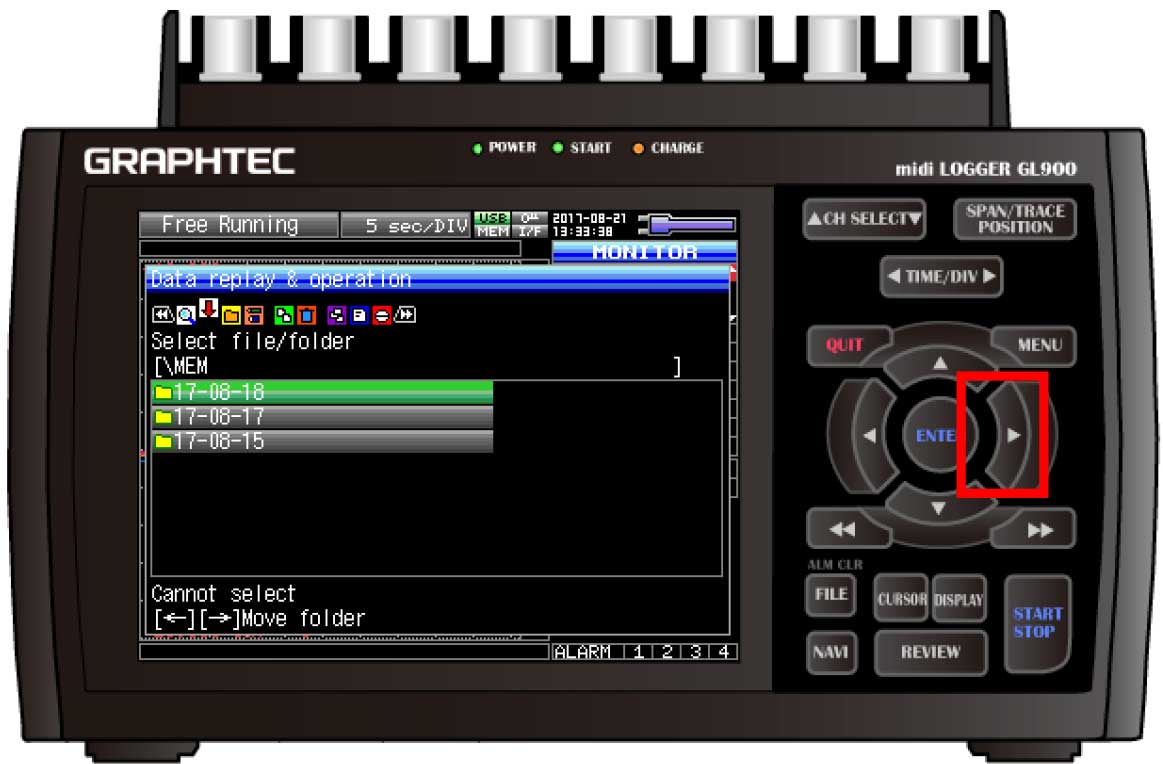
Use right arrow key (highlighted in red) again to enter the folder.
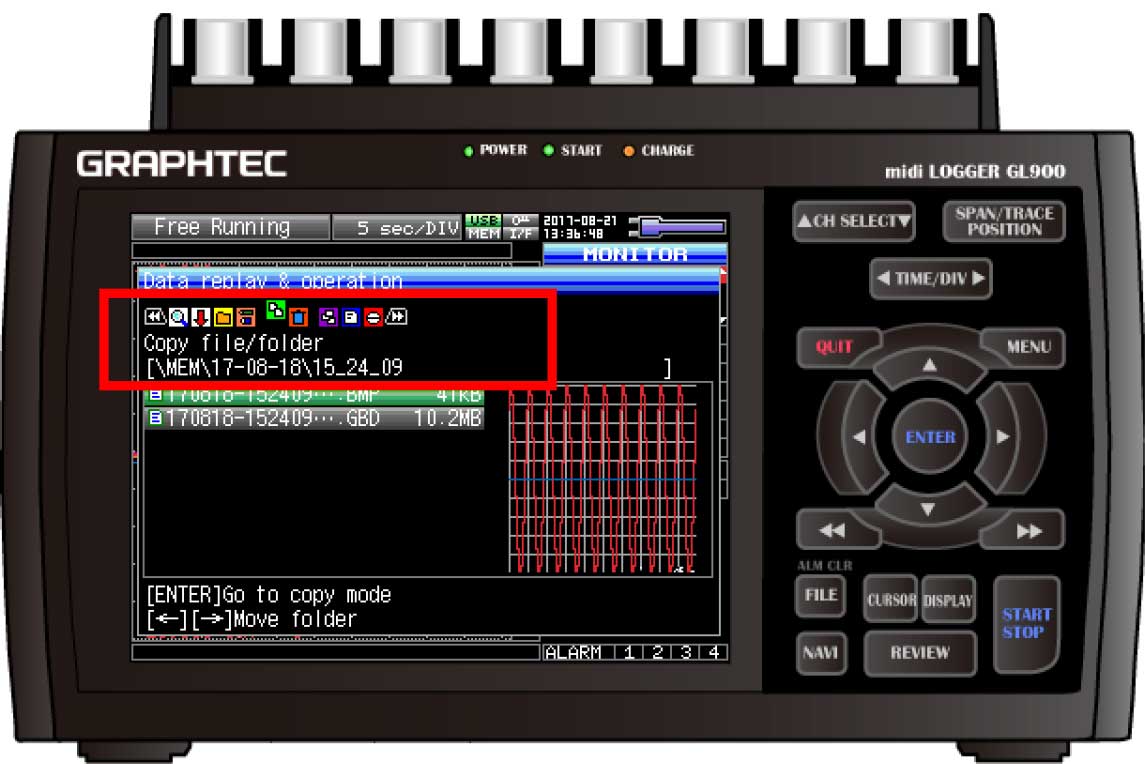
When you find the file or folder that you would like to copy, use the double right arrow keys to find that option among the menu selections.
When you find the option you want, hit ENTER.
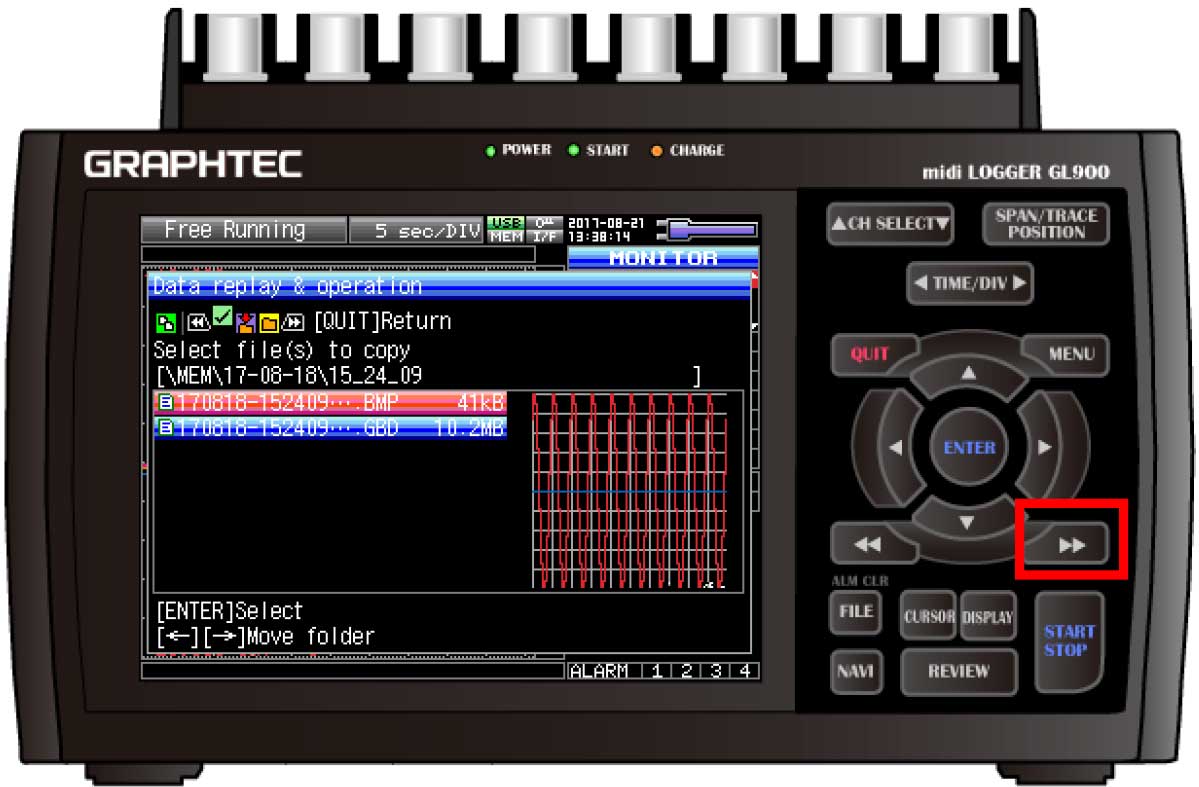
Scroll over the files you want and hit ENTER over them to select them and once selected, hit the double arrow right button (highlighted in red) to choose where to put those files.
Now select the destination and hit enter. It will pop up a message asking if you’re sure you want to transfer, hit ENTER transfer, hit ENTER to complete.

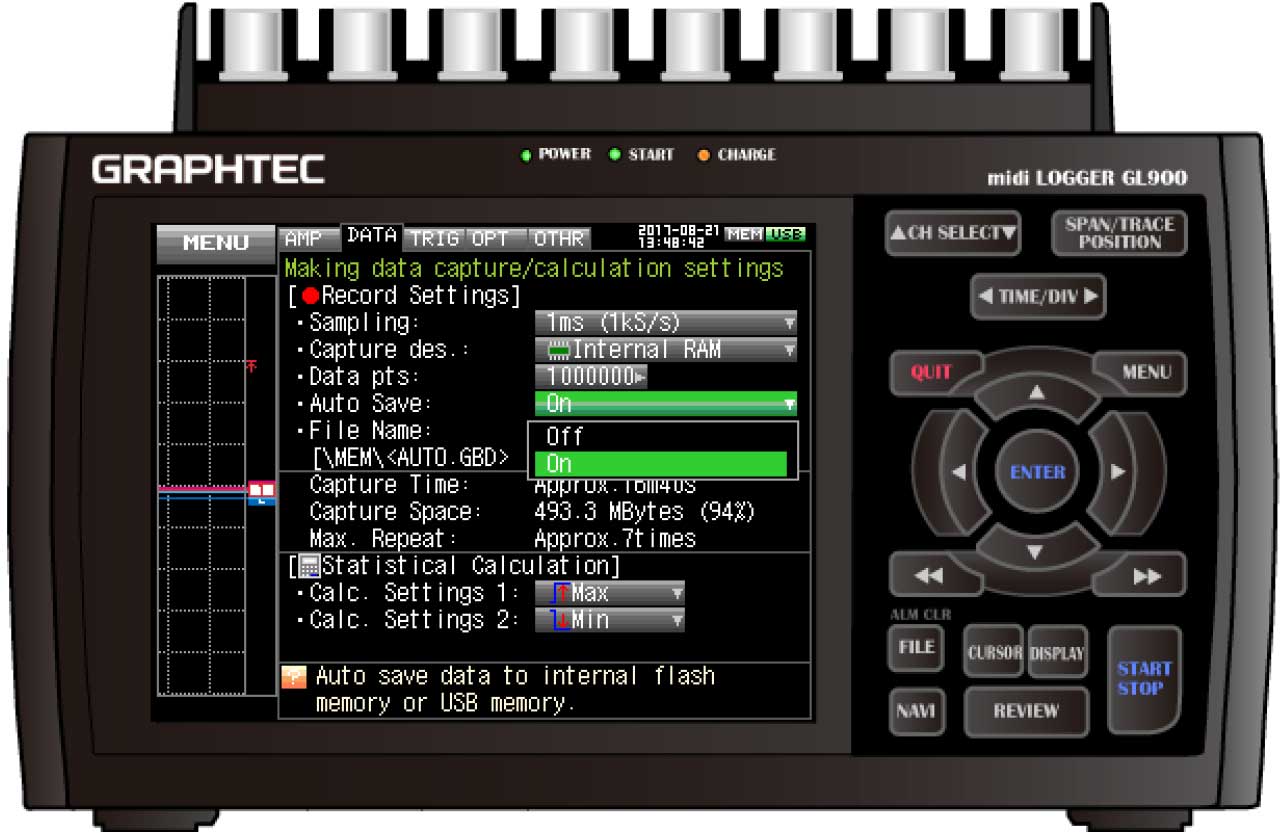
Step 4: Another way of saving your files to your USB would be Auto save. This can be used as a destination setting in the case you have a flash drive plugged in. The auto save feature will also help save the Internal RAM memory onto the internal flash. This Is a good idea if you want instant capture and analysis features, which you can always transfer to a flash drive after your analysis. To activate auto save, hit MENU (highlighted in red)
Step 5: Scroll right to the DATA tab and go down to Auto Save and Change it to on.
INSTRUMENTS > FAQ > GL900