
INSTRUMENTS > FAQ > HOW TO SWAP FLASH DRIVES WHILE RECORDING
HOW TO SWAP FLASH DRIVES WHILE RECORDING
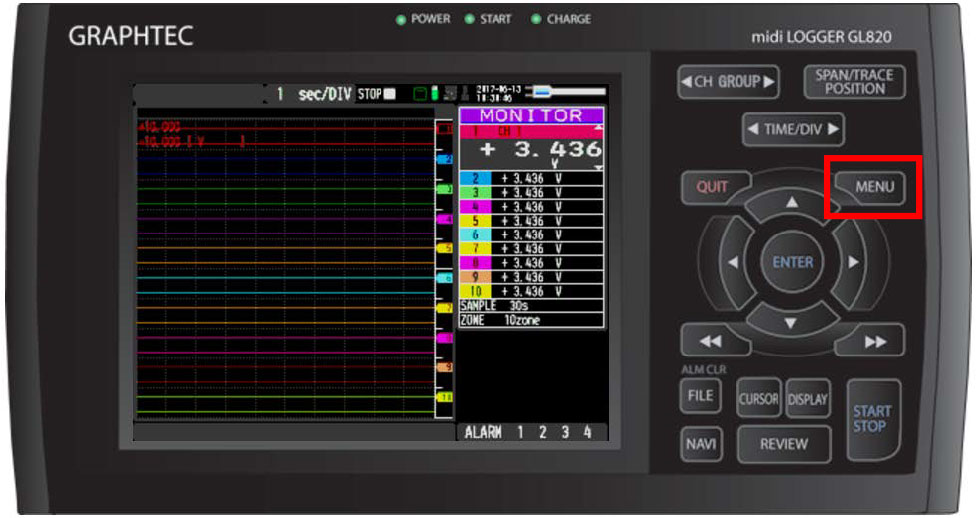
Step 1: Once you have the GL powered on go ahead and inset the flash drive you wish to save too. While at the main screen, press MENU (highlighted in Red).
Step 2: Scroll over one right with the arrow key to the DATA tab.
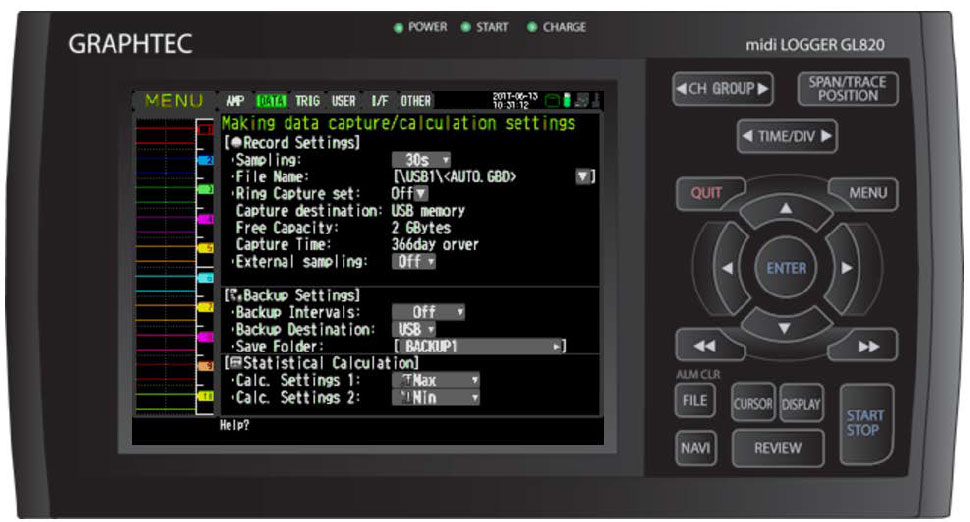
Step 3: Scroll down using the arrow keys to the File Name: (highlighted in Red) and hit enter. When the Record Settings menu appears, choose Folder (Highlighter in Yellow) and hit enter.

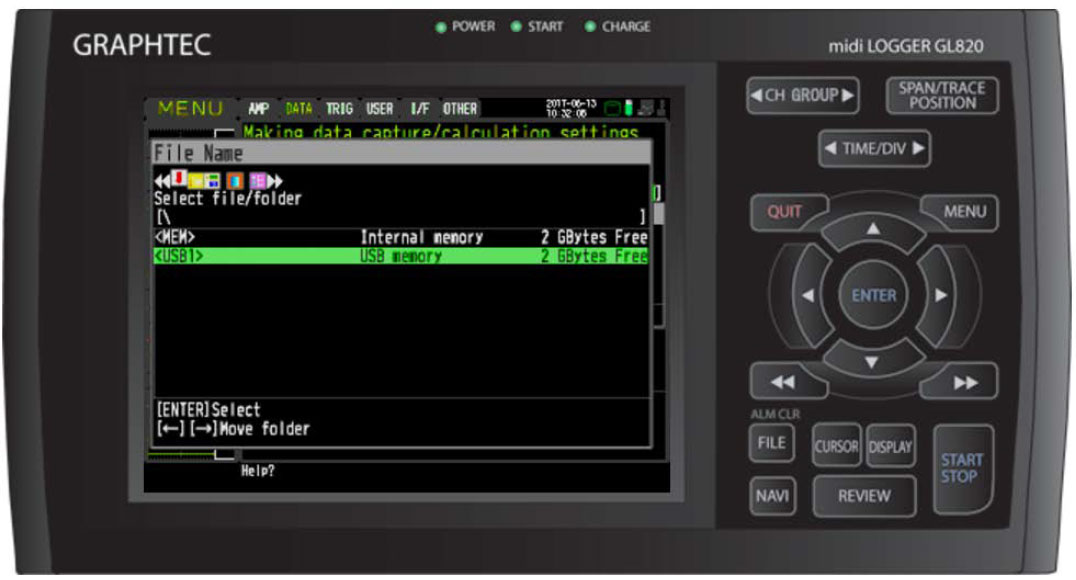
Step 4: In the new menu, wait for you USB memory device to pop up, as shown above. Once you see it, select it by highlighting it and hitting ENTER on the GL.
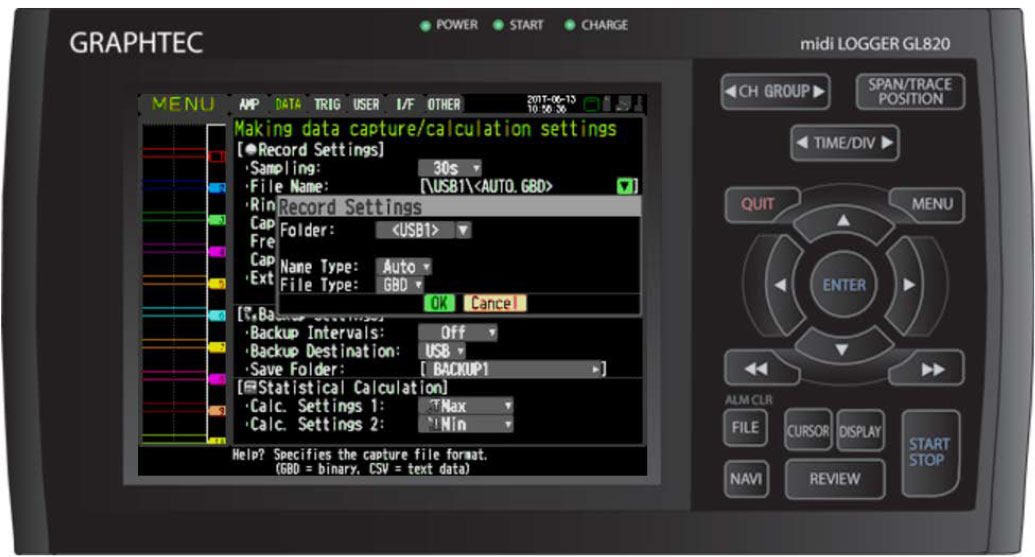
Step 5: You will be brought back to the above screen. After you hit OK on the Record settings menu, click QUIT on the GL and it will take you back to the main screen.
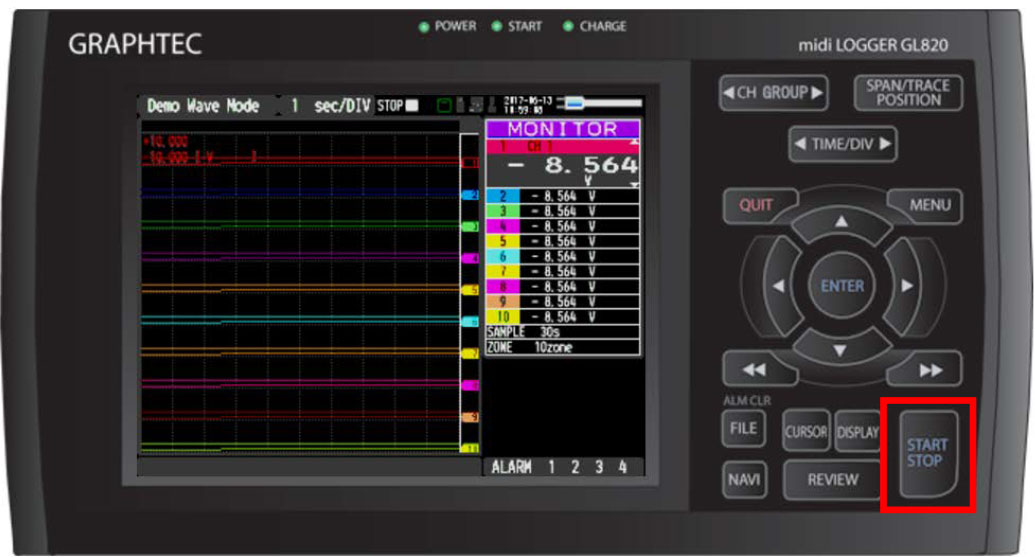
Step 6: Now that your settings are set, go ahead and start recording by hitting the START/Stop button (highlighted in red).
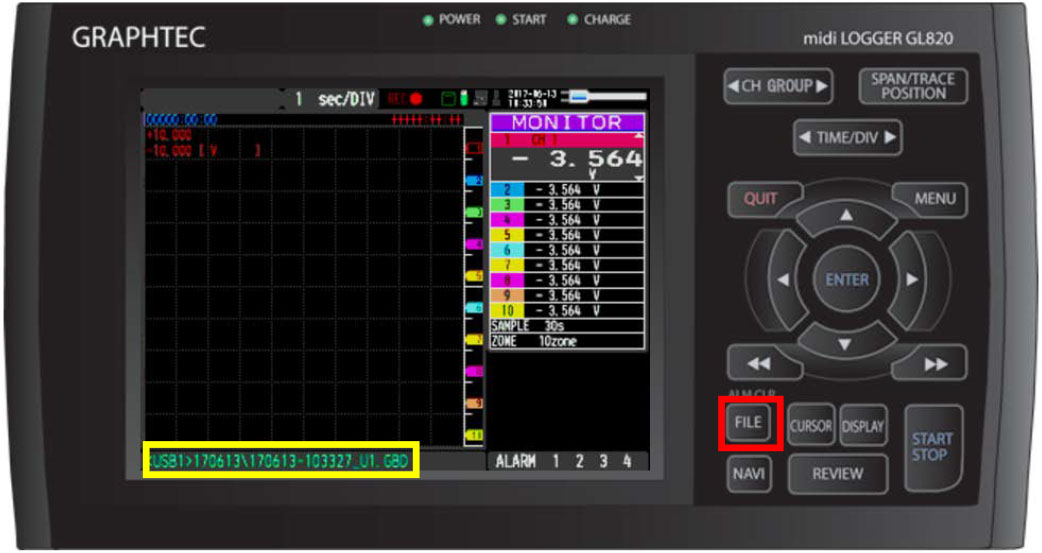
Step 7: Once recording is started, you can change your USB memory drive at any time you’d like. To do this, hit the FILE button (highlighted in Red).
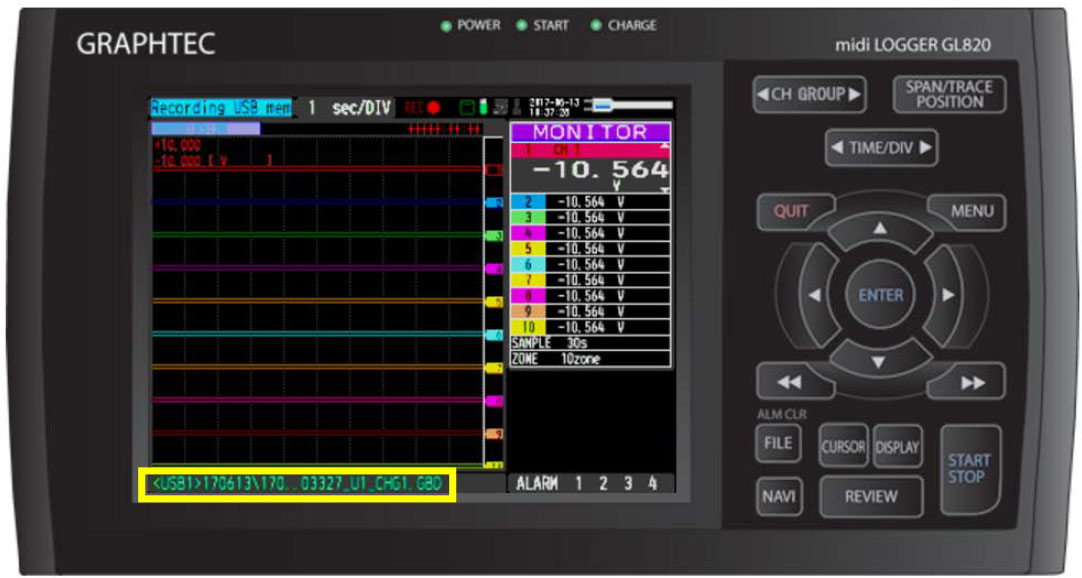
***** Take not of file name.. (Highlighted in Yellow)
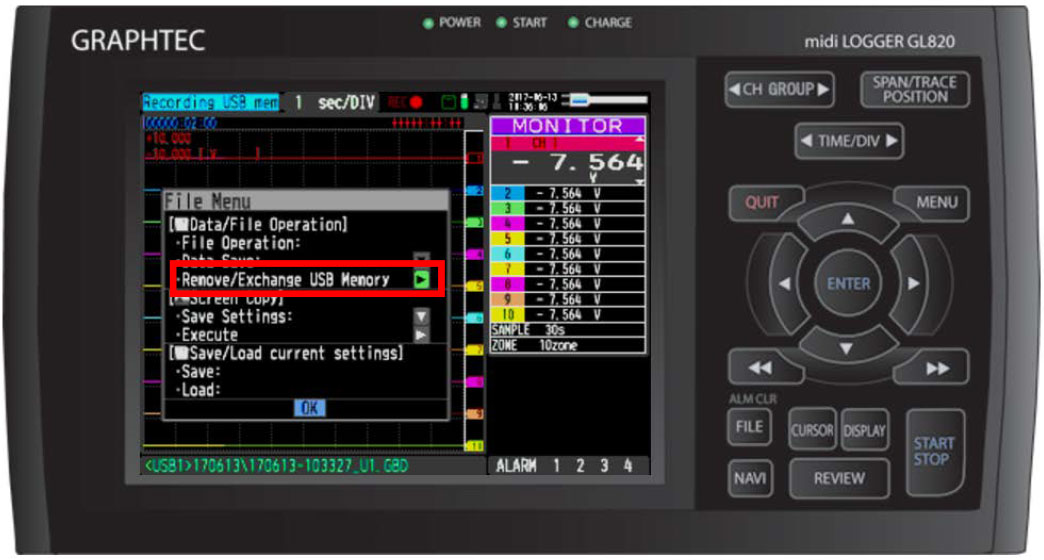
Step 8: The FILE Menu will pop up, from here scroll down to Remove/Exchange USB Memory (highlighted in Red) and hit ENTER.
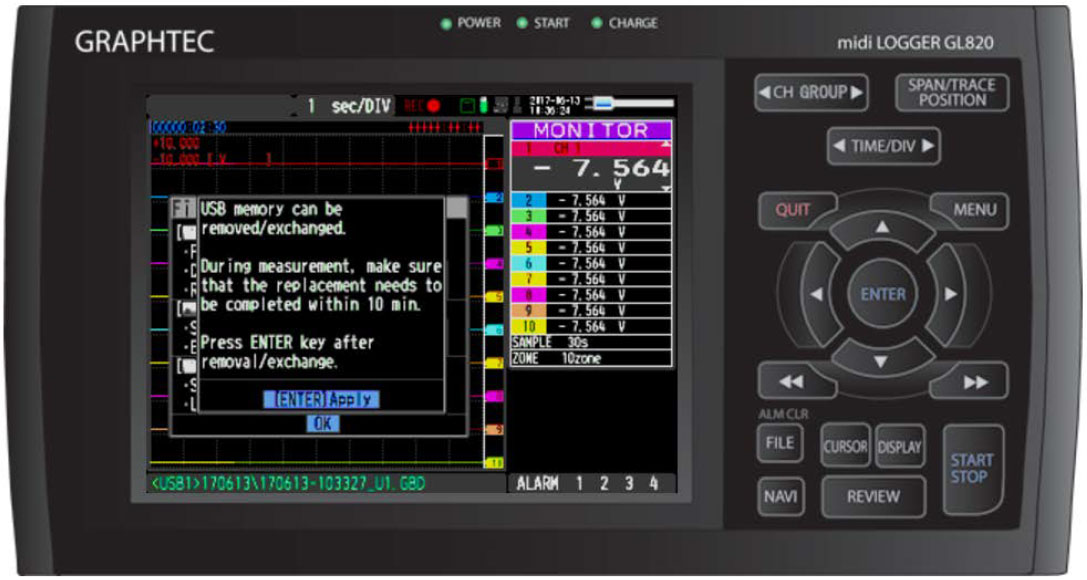
Step 9: You will get this message, do not hit enter until you have changed out your USB memory drive and then press ENTER. From there you can hit QUIT to go back to main screen.
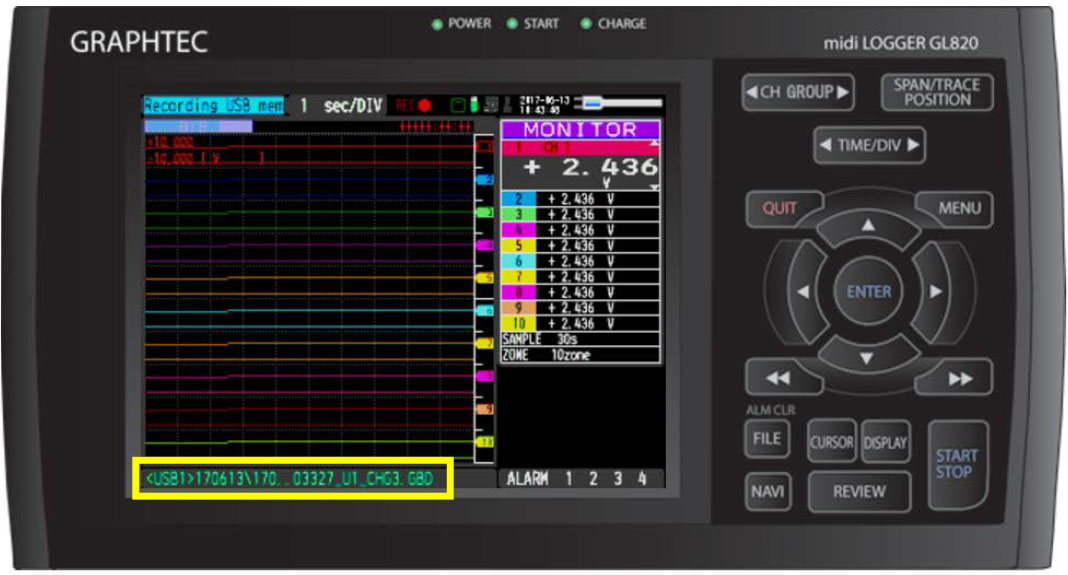
Step 10: As you continue to swap out flash drives by repeating steps 8 & 9, you will notice that the file name changes slightly. If you look back to step 7, you can see the file name did not have _CHG.GBD in it. As you start to swap out device, the first file will add_CHG1 to the file name and increment the number as you keep doing this. The three pictures above are the 3 different time I swapped it out after the original recoding. If you look at the highlighted Yellow, you can see the change that was mentioned.

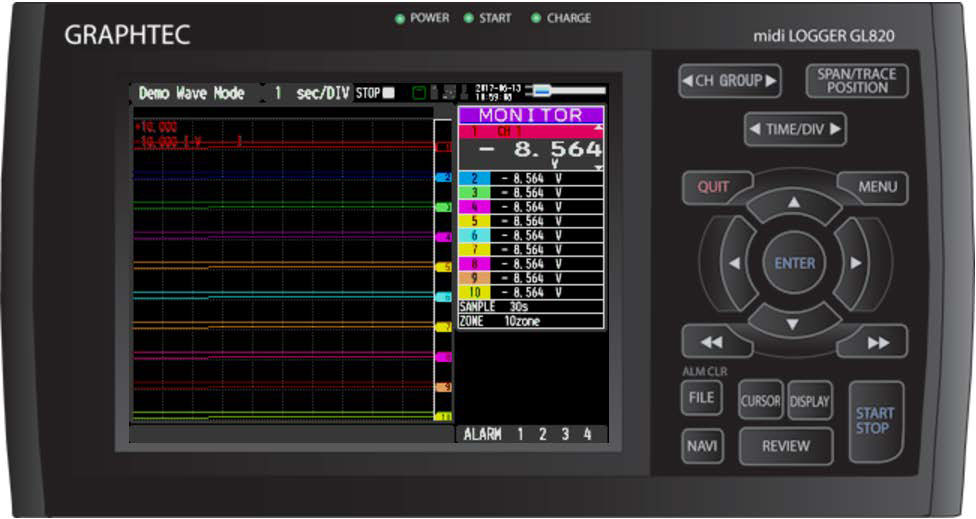
Step 11: After you recording is done, you can hit the START/STOP button on the GL to get back the the main screen as pictured above.
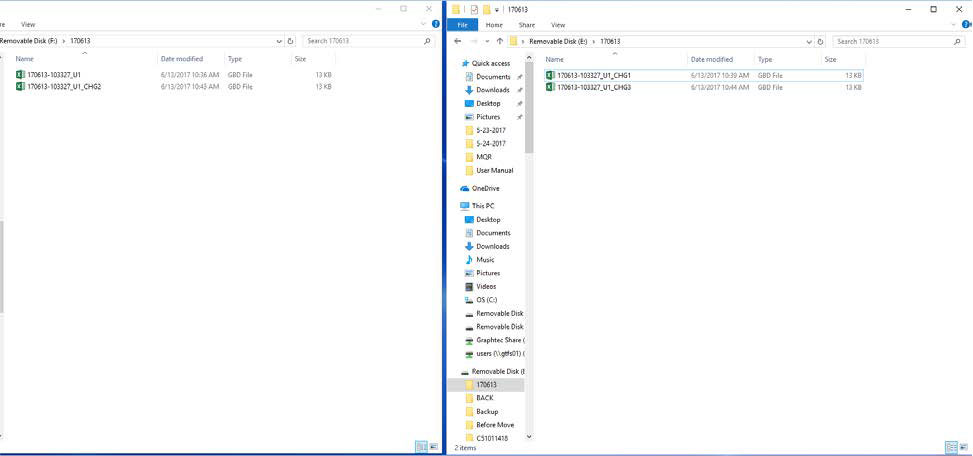
Step 12: This is what your files will look like after recording. You can see that there are separated from when the USB Memory was switched out.
INSTRUMENTS > FAQ > HOW TO SWAP FLASH DRIVES WHILE RECORDING